


Lightroom Tips for Travel Photography
Travel photography is about capturing moments that allow you to relive the feeling forever. It reflects the essence of your journey, the landscapes, the light, and the emotion in every scene. But even with a great eye and technique, most images benefit from a few thoughtful adjustments to truly stand out. Tweaking colors, enhancing light, or removing distractions, this is where Lightroom becomes your best ally. And the best part? It’s easier to use than you might think.
Adobe Lightroom is a powerful, beginner-friendly editing tool that helps you improve colors, fix lighting, remove distractions, and bring consistency to your travel photos, without the complexity of Photoshop. In this step-by-step guide, you’ll learn how to edit travel photos in Lightroom, from importing your images to applying presets and fine-tuning details. Whether you’re just starting out or looking to improve your editing workflow, these Lightroom tips for travel photography will help you create beautiful, professional-looking images with ease.
Why You Should Edit Your Travel Photos in Lightroom
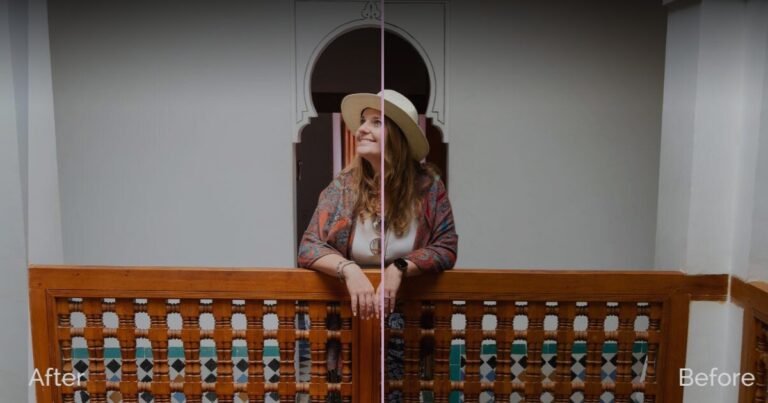
Editing your travel photos in Lightroom goes beyond improving image quality, it’s about preserving the emotions and stories behind each moment. Enhancing colors, adjusting lighting, and refining details help you bring your memories to life, turning snapshots into vivid experiences.
When you edit your photos, you’re creating a visual narrative that reflects how you felt during each adventure. Whether it’s a glowing sunset, a spontaneous city escape, or a quiet moment in nature, Lightroom photo editing allows you to relive your travels with more depth and emotion, just as you experienced them. It’s like building a photo story where you are the main character.
RAW vs JPEG: What’s the Best Format for Travel Photography?
Before you start editing your travel photos, it’s important to understand the difference between RAW and JPEG formats. This choice impacts how much control and flexibility you’ll have when enhancing your images.
What Are RAW Files?
RAW files are like digital negatives. They store all the data captured by your camera sensor, giving you greater control during editing. With RAW, you can recover shadows, fix exposure, and fine-tune colors without losing image quality. The trade-off? These files are large and require more storage and processing power, but they’re ideal for photographers who want full editing flexibility.
What About JPEG?
JPEGs are compressed and processed by your camera, making them smaller and ready to share instantly. While convenient, JPEGs offer limited editing potential. Over-editing can reduce image quality since much of the original data is discarded during compression. That said, JPEGs are great for beginners and perfect for editing smartphone travel photos. I still edit JPEGs from my phone all the time and get results I love, so don’t stress if you’re not ready for RAW just yet.

Want to level up your shots before editing?
Check out our guide: Best Travel Camera Gear for 2025 — perfect picks whether you’re just starting out or already a seasoned explorer behind the lens.

How to Organize Your Travel Photos for a Smooth Lightroom Workflow
Before you even start editing your travel photos in Lightroom, there’s one essential step you shouldn’t skip: organizing your files. A clear and consistent system saves hours of frustration and helps keep your photo library efficient and easy to navigate, especially when you’re working with large RAW files.
Start With a Folder Structure That Works
Even if you’re not a pro yet (I’m still improving too!), the earlier you build a good habit, the better. I recommend a folder hierarchy like this:
YEAR > LOCATION > EDITED vs NOT EDITED > PHOTO or VIDEO
This makes it easier to find what you need, whether you’re editing last year’s beach trip or pulling a clip from your latest city break.
Use External Hard Drives for Heavy Files
If you shoot in RAW, external hard drives are a must. These files take up a lot of space, and keeping them off your computer helps avoid slowdowns. Create folders by destination and then break them down further by day, landmark, or file type (e.g., photos vs. videos).
For example: 2025 > Paris > Day 1 > Eiffel Tower > Photos.

Back Up With Cloud Storage (But Choose Wisely)
I also back up my key documents and edited content using Google Drive, which allows me to access and work on projects while traveling. I don’t upload all my RAW files, those stay on the hard drive, but I do keep edited versions and important docs online.
Pro tip: While services like Google Photos are popular, they often compress files, which can reduce quality. Google Drive maintains original quality and offers a great search function. Other good options include Dropbox, iCloud, and Adobe Creative Cloud, choose what best fits your workflow and budget.
Bonus Tip: Diversify Your Camera Kit
Keeping your photos organized makes importing and editing much easier, and ensures you always know where to find your files when you need them.
Along with external hard drives, having the right Photography Gear and Accessories can make a big difference when you’re on the road. I always recommend traveling with at least 2–3 types of cameras, like a waterproof camera, a drone, or a mix of a mirrorless and an action camera, so you’re ready for any kind of adventure.
How to Import Your Photos Into Lightroom the Right Way
Once your photos are properly organized, it’s time to bring them into Adobe Lightroom, the tool where your editing journey begins. But before you rush in, there’s an important detail you need to know: Lightroom doesn’t store your photos. It simply references them from their existing location on your computer or external hard drive.
That’s why organizing your images before importing them into Lightroom is essential. Once that’s done, follow these simple steps.
Step-by-Step Guide to Import Photos into Lightroom
Open Lightroom and click on the Import button in the bottom-left corner.
Navigate to the folder where your images are stored, ideally, this is your external hard drive.
Select the photos you want to import.
In the Import dialog, make sure to select “Add” instead of “Copy” to avoid creating duplicate files.
This method keeps Lightroom referencing your original files without changing their location.
Add Keywords for Easy Photo Organization
While importing, it’s helpful to add keywords to your images, like the year, month, or location (e.g., 2024-07 Barcelona). This improves your workflow and makes it easier to search and sort your images later inside Lightroom.
- Lightroom vs Lightroom Classic: Which One Should You Use?
There are two versions of Adobe Lightroom:
Lightroom (cloud-based): Ideal for users who want easy access across multiple devices and quick edits, perfect for mobile workflows or editing on the go.
Lightroom Classic (desktop-based): Designed for photographers who prefer advanced tools and detailed control over their photo organization and editing process.
Choosing between the two depends on your workflow: if you need flexibility and cloud storage, go with Lightroom. If you’re after full control and deeper editing capabilities, Lightroom Classic is the better choice.
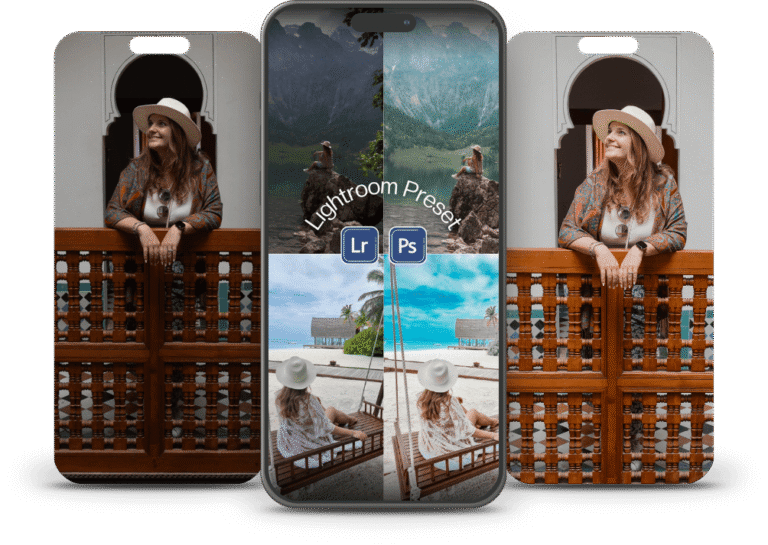
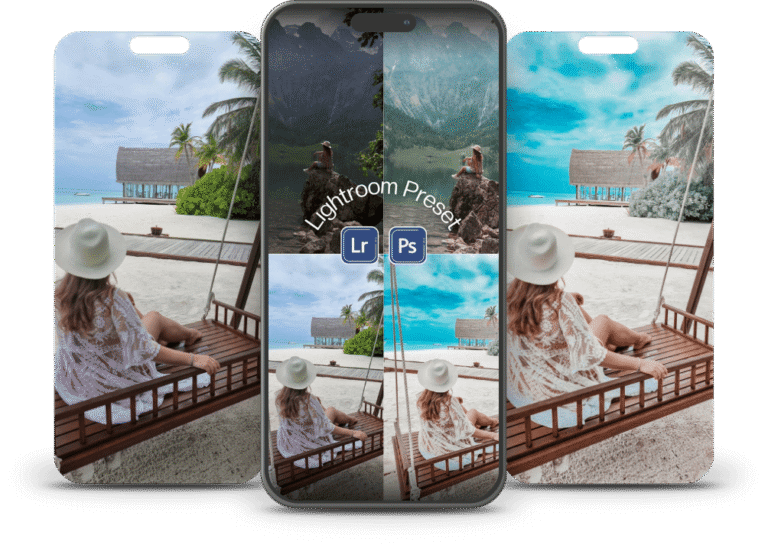
Speed Up Your Editing Workflow: How Lightroom Presets Can Help Beginners Edit Faster
f you’re just starting out in photography or content creation, editing your images can feel overwhelming. That’s exactly how I felt in the beginning. Fortunately, Lightroom presets are a great way to simplify the process and find your style faster.
Presets are essentially pre-saved adjustment settings, think of them as templates for things like exposure, contrast, white balance, and color grading. They’re not filters in the traditional sense, but customizable tools you can apply with a single click to streamline your editing workflow.
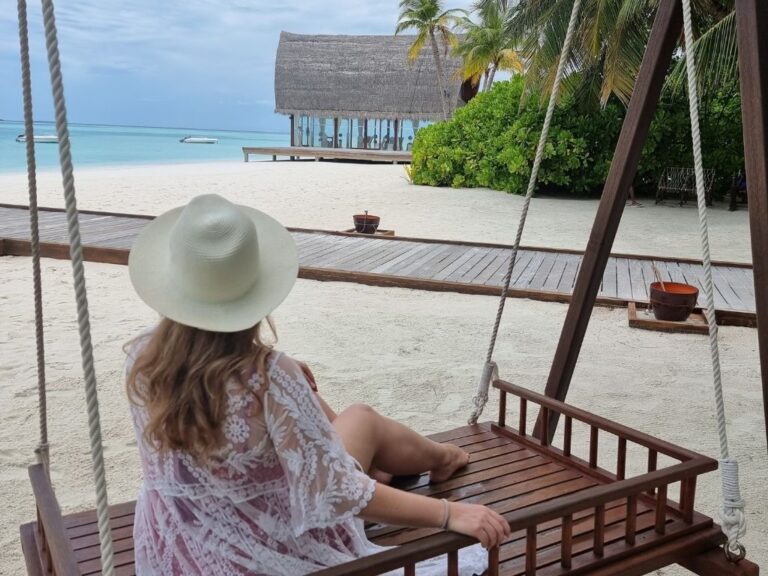
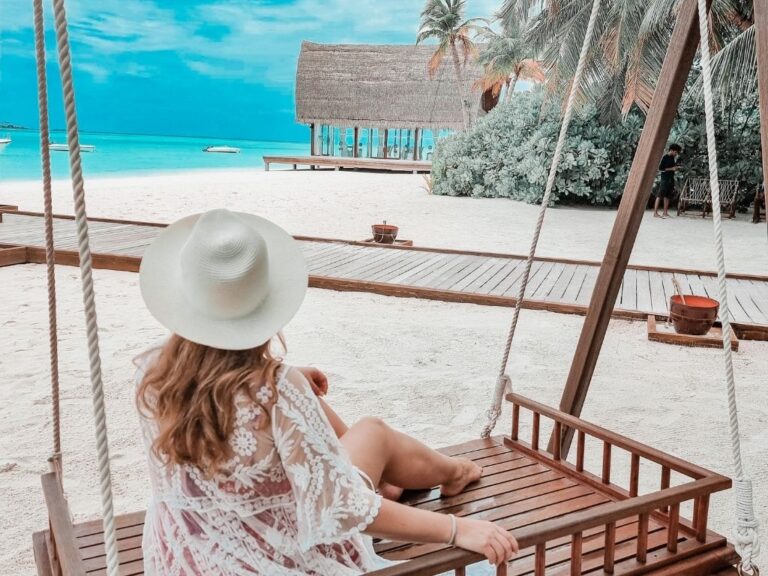
Achieve a Consistent Look with Lightroom Presets
Using presets is a smart way to create a consistent aesthetic across your travel photos. Whether you’re aiming for a bright and airy vibe or a darker, moodier tone, presets help you maintain visual coherence.
You can purchase Lightroom preset packs online, my first one was from Etsy, or explore presets from creators and influencers who sell them through their profile links. If you admire someone’s style, it’s worth checking if they offer their own editing presets.
Creating and Customizing Your Own Presets
You also have the option to create your own Lightroom presets. After adjusting settings like Highlights, Shadows, Whites, Blacks, and Saturation, you can save those changes as a custom preset. This makes it easy to apply the same edits across your entire photo set or gallery.
To keep things simple, start by copying and pasting settings or saving a new preset directly within the Develop module. Over time, you’ll develop a better understanding of how each setting influences the final image.
Why Presets Save Time for Travel Photography
One of the biggest advantages of using presets is the time they save, especially when working with a large batch of travel photos. Instead of editing each image from scratch, you can apply your preset as a base and then fine-tune elements like exposure or shadow detail individually.
Once you get into the habit, you’ll notice how much more efficient your editing becomes. Presets not only speed up your workflow but also help you define and refine your personal editing style.
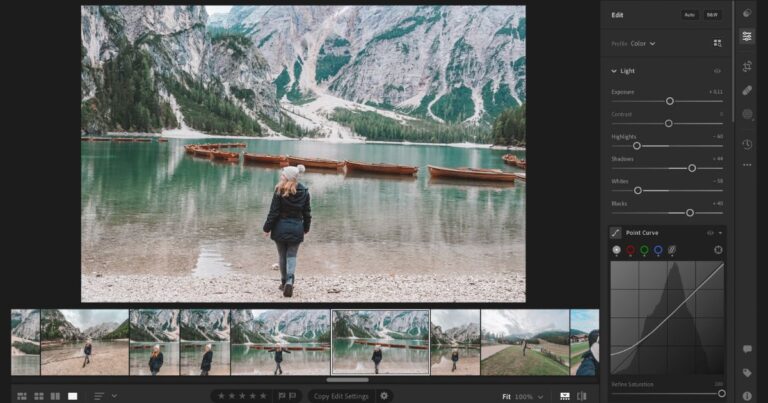
Basic Lightroom Adjustments for Travel Photography
Once you’ve imported your travel photos and applied a preset, or chosen to start from scratch, it’s time to make some basic adjustments. These foundational edits are essential para transformar suas imagens em algo mais vívido, natural ou expressivo.
Exposure
Exposure defines how bright or dark your image appears overall. It’s usually the first adjustment to make. Increase the exposure if your image looks too dark, or decrease it if it’s overly bright. A balanced exposure is key to making your subject stand out.
Highlights and Shadows
Lowering the Highlights helps you recover details in bright areas, like skies or reflective surfaces. Raising the Shadows brings back detail in the darker parts of your photo, ideal for forests, interiors, or backlit scenes.
Whites and Blacks
These sliders refine your contrast. Decreasing the Whites can soften bright spots, while darkening the Blacks adds depth and a moodier feel. Together, they help you control the tonal range of your photo.
Color Correction: White Balance and Mood
Adjusting the White Balance ensures your image has accurate and natural-looking colors.
Use the Temperature slider to warm up (add yellow tones) or cool down (add blue tones) the photo. The Tint slider helps fine-tune any green or magenta hues. This is especially useful in golden hour or mixed lighting conditions.
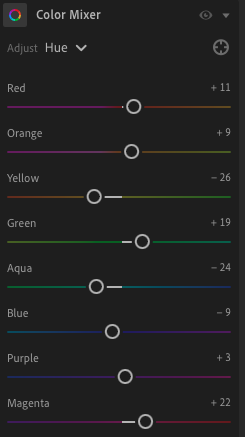
HSL / Color Panel
In the HSL Panel (Hue, Saturation, Luminance), you can adjust each color individually:
Hue changes the actual shade of a color (e.g., from blue to turquoise).
Saturation increases or decreases how intense that color is.
Luminance controls how light or dark the color appears.
Tone Curve
The Tone Curve allows for more precise control of light and contrast. You can deepen shadows, lift highlights, or create a soft fade for a film-like feel. It’s a subtle but powerful tool for fine-tuning brightness and mood.
Crop and Straighten
Use the Crop Tool to reframe your photo, align the horizon, or adapt it to different platforms (like 4×5 for Instagram or 16×9 for web). A well-composed crop can make all the difference.
Lens Corrections
Not every photo needs it, but wide-angle lenses (and smartphones) can introduce distortion. In Lightroom’s Lens Correction panel, you can fix warped lines and vignetting for a cleaner look. Personally, I don’t use this tool often—but it’s worth knowing it’s there when needed.
Exporting Your Image: Best Settings for Social Media and Print
Once your travel photo is fully edited in Lightroom, it’s time to export and share it. The export settings you choose will depend on how you plan to use the image—whether it’s for Instagram, your blog, or a high-quality print.
Exporting for Social Media
If you’re uploading your images to Instagram, Facebook, or any other online platform, it’s important to export with web-friendly settings.
Image Width: Around 1500px on the long edge is ideal.
Resolution: 72 dpi is standard for screens.
File Size: Aim for under 1MB to ensure fast loading.
This keeps your image sharp but lightweight, perfect for a smooth viewing experience across all devices.
Exporting for Print
Planning to print your travel shots? You’ll want the highest possible quality.
Resolution: Export at 300 dpi for professional-quality prints.
File Dimensions: Use full-size images, with no resizing.
Format: JPEG works well for most prints, but TIFF may be better for larger or more detailed projects.
The key is to maintain all the detail and color richness in your final image, so it looks just as good on paper as it does on screen.
Keep Practicing and Find Your Style
Editing your travel photos in Lightroom is a creative process that gets better with time. While you now know the basic steps, from presets to final export, the real magic happens when you explore, tweak, and trust your eye.
Try different styles, compare your edits, and don’t be afraid to experiment with new techniques. Over time, you’ll build an editing workflow that feels natural and reflects your unique perspective as a traveler and visual storyteller.
Remember, you can always go back and tweak your settings as you improve your skills. So, take your time, enjoy the process, and watch your travel photos transform into stunning memories.